| |

17. TIP
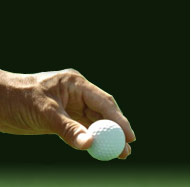
The Art of Chipping – Part 1
In my last tips, I have tried to convince you that practising your putting effectively will have a huge impact on your play. However, short game is much more than putting. Over the next few months I will focus on approach shots, starting off with the chip and run, followed by the pitch and finally turning to the green bunker shot.
Let’s start with the basics of the chip and run: The chip and run is a low trajectory shot where, in general, the ball rolls a longer distance than it flies. Most golfers refer to the chip and run as “chip shot” or “chipping” only, which is what I will do in a moment. However, you should keep mind that the “and run” reflects what is fundamental for this shot, i.e. the relatively long rolling of the ball.
The chip shot is typically played from very close to and around the green. Your goal should be to let the ball land on the green after a short travel through the air and to get it rolling like a putt into the hole or, at least, close to it in a position where you can complete the hole with one putt. The perfect scenario is referred to as “chipping in”, the second best situation is known as getting “up and down" or “up and in”. Although it is perhaps one of golf’s greatest thrills to hole a shot from off the green, getting “up” onto the green with your chip (or pitch or bunker shot) and being able to get the subsequent putt “down” into the hole, is still a very effective way to keep your score low.
In comparison to a full swing, a chip shot is quite easy to learn. And since a good chipping game is a great equaliser for too many fairway shots, this skill is, in particular, important for beginners or short hitters. However, also advanced players who, in my experience, tend to neglect their short game should keep in mind that the ability to convert chip shots into "one putts" is indispensable for a successful golf. And although practice doesn’t always make perfect in golf, it definitely helps.
Next month, we will focus on chip shot choices and technique.
 TOP TOP

16. TIP
The Art of Putting – Part 5
Think about how many times you said to yourself, "I always make that putt" or "I should have made that putt." But have you considered how many times Tour professionals make their putts? These are the actual putting percentages made by Tour players from a few years ago.
| DISTANCE |
PERCENT MADE |
| 0,6 m (2-foot) |
99 % |
| 0,9 m (3-foot) |
91 % |
| 1,2 m (4-foot) |
81 % |
| 1,5 m (5-foot) |
70 % |
| 1,8 m (6-foot) |
62 % |
| 2,1 m (7-foot) |
54 % |
| 2,4 m (8-foot) |
47 % |
| 2,7 m (9-foot) |
43 % |
| 3,0 - 4,2 m (10-14 foot) |
31 % |
| 4,5 - 5,7 m (15-19 foot) |
19 % |
| 6,0 - 7,2 m (20-24 foot) |
14 % |
| 7,5 m (25-foot) & greater |
6 % |
| |
Source: PGA Tour 2004 Statistics |
How does your putting compare? So, next time you miss a 3-m birdie putt you should stop beating yourself and remember that even Tour Players made just 31% of the time.
TOP
15. TIP
The Art of Putting – Part 4
Are you having trouble to read the green? Then try this drill:
Select a hole that is situated on a slope of the green. Place balls in four different positions 1.0 m away from the cup. Now line up and try to hole all the balls, noting how the break is different on each putt. If you miss, replay the putt from the same spot. After you have made all putts repeat the exercise from 1.5, 2.0, 2.5 and 3.0 m away from the cup. This will give you a „par“ of 20 putts. At the end of the exercise, add up the actual number of putts it took you to complete the 20 attempts. To be at the level of a Tour professional your score would have to be somewhere between 20 and 25.
Are you having trouble with putting distance control? Then try rehearsing a few strokes without a putter while standing in a golf-like address position. Now, take a ball in your hand or just imagine you are going to roll the ball toward the hole. When you think you have good feel for how hard to roll it, put the putter back in your hand and use the same motion to hit the ball.
Remember: Taking a few putts on the practice green before beginning play can give you an advantage to reading the speed of the greens on a particular day at a particular course. It's better to make adjustments on the practice green than on the first hole. Also, watch your partners' chips and putts. How does the ball act on the green? When you putt, whether the result is good or bad, pay attention and mentally record what took place. I’m sure you will need it again someday.
TOP
14. TIP
The Art of Putting – Part 3
The goal of every putt you hit is to start the ball on the desired line and at the correct speed because this gives you the best chance to hole it. Since you find the putt to make very rarely perfectly straight and flat, the ability to read greens is indispensable. The skill of reading greens is in matching the roll speed of the putt to the amount of curve that, in particular, the slope of the green and, to a certain extent, the grain of the grass will have on the putt. This combination of speed and break (i.e. curvature of the putt) is what each player is trying to determine with the read.
When reading a green, get behind the ball and squat. Try to imagine how water would run off the surface of the green starting the position of your ball and ending in the hole. This might help you to determine the slope and also the high and the low side of the hole. The more the slope, the more the ball will curve downward. Now, you have to add up all this information and determine the starting line and the speed of your putt, the latter of which is affected by the texture of the surface. Remember, the ball will break more as it loses the energy of your stroke and slows down. Since gravity can only work in your favour if the ball is above the hole, choose a line that will start the ball to the high side of the hole. Put only enough speed on it so it will slow significantly as it approaches the hole and hopefully drops in.
TOP
13. TIP
The Art of Putting - Part 2
If you like to work on your putting, try this drill:
Choose an area on the putting green where the surface is flat an with little to no break. Take three golf tees and push them into the ground at a distance of 1.0 m, 1.5 and 2.0 m to the hole. Try to sink five putts in a row from 1.0 m, then from 1.5 m and finally from 2.0 m. Miss one? Sorry, then you have to start the drill over again and go back to the 1.0 m distance.
If you can get past the first two stations, you are doing pretty good. Don't stop until you at least make it to the 2.0 m distance. The first time you try this, it may take you up to 45 minutes. Have patience. The more you practice the better you will get.
TOP
12. TIP
The Art of Putting - Part 1
Putting is one of the most important scoring skills. Statistically, putting makes up at least 40 % of your total score. Obviously, this is why tour professionals spend several hours on the putting green each day. However, most amateur players seem to believe that hitting a few putts on the way over to the first tee is all it needs to become a better putter.
Over the next few months I will introduce you to some exercises that may help you to improve your putting. But let’s start with the basics.
Putting is an individual art. There is no particular swing, grip or body position that can considered to be truly the best. You need to develop style and routine that suits you and that you are able to repeat under game situations. Still I would like to offer some suggestions that you may find helpful:
When aligning your body to the target (for details see tip #4), the ball should - for right-hand players - be opposite the left foot rather than opposite the middle of the stance. At impact, the putter will then be in the upward motion which causes the ball to roll forward as desired.
Anchor the elbows to your sides so that your shoulder and arms form a triangle. Keep this position throughout the swing. This helps to achieve more consistency.
The motion only comes from the shoulders. Just like a pendulum, your putter goes the same distance back as it does through while keeping a constant speed. This helps to better control the distance.
Keep the rest of your body, especially your head, still during the stroke. This helps keeping the ball on line.
When having to putt downhill or on a fast green the ball should only be addressed with the tip of the putter and not with its centre as you normally do. This causes the ball to roll more slowly.
TOP
11. TIP
What you should know about scoring - Part 4: Scrambles
I would like to finish the overview on scoring by introducing you to one of the most popular tournament formats in golf: the Scramble.
In Scramble, you build a team with up to three other players. Each player in the group tees off on every hole. Then, the team selects the best drive and marks its position within a scorecard length with a tee (not nearer the hole) while the rest of the team retrieve their balls. The player whose ball has been chosen then plays his or hers next shot first. Then the other team members hit their second shot after having placed their balls on a spot within a scorecard length of the tee (again, not nearer the hole). The team then decides on the best position from which to play their third shot. This process is continued until the green is reached. On the green, the ball chosen is marked by a putter head length (no nearer the hole) and each member of the team putts from the same spot in turn until the ball is holed. At the end of the round the team a adds up the total for each hole on the team’s scorecard which is then signed by two of its members. The winning team is the one with the lowest score.
In a pure Scramble no golf handicaps are used in the scoring and there are no restrictions on shot selections. Your best player’s shot can be used 18 times off the tee. Thus, Scramble can give you the opportunity to record the sort of score you normally only dream about.
Over the years several variations of this format have evolved:
In Florida Scramble, for example, the player whose ball is selected is prohibited from hitting the next shot. As you may imagine, this is not the type of games golfers with low golf handicaps like the best.
In Texas Scramble, the tee shot of each player is to be used at least three times. This variation is not only an excellent way to bring everyone into the game. It also involves more strategy. Some like to get the tee shots of the weaker players used up quickly, some like to leave their shots until the end. Still, a cardinal rule is never allowing a weaker player to be forced to hit the final tee shot.
Playing a Scramble is a great way to spend a nice day on the course and a good way of starting the golf season off.
TOP
10. TIP
What you should know about scoring - Part 3: Matchplay
In this system of scoring, each hole is played as a mini match. The player with the lowest score for the hole is said to win the hole, the par of each hole does not matter. However, in order to balance out the different ability levels handicap shots are given to the weaker player.
In matchplay your are playing against another player and not (only) against the course. So if you take four shots and your opponent takes five, you win the hole. You are then said to be „one-up“, while your opponent is said to be „one-down“. If your opponent wins the next hole, the match is „all-square“ If both players get the same score the hole is 'halved' and the match score stays the same.
The score is kept by the number of holes up (won) and the number of holes to play. For example, your opponent might be two-up, with six holes to play. When a player is up by more holes (for example: three-up) than there are holes remaining (for example: two holes), then he has won the match. In this case, the final score would read 3&2. A match is considered „dormie“ when one player is up by the exact number of holes that remain. The other player then only has the chance to halve the match.
In case a match is „all-square“ after 18 holes and a winner is required, the players return to the first hole and start again playing so long until one player can win a hole outright. This is called a „sudden-death“. If a player wins on the first extra hole the result would read „won on 19th hole“.
Because the match is played between the two players, it is - in contrast to other forms of competition, i.e. medal and stableford play, possible to concede a putt (so called „gimmie“) by picking up your oppositions ball without holing him out. A player can concede a hole at any time that he presumes he can no longer win or halve the hole.
TOP
9. TIP
What you should know about scoring - Part 2: Stableford Scoring
The Stableford scoring system is a stroke-play format where each player plays against the par of each hole and receives points according to how he scores in relation to par. Here, expressions like “birdie” or “bogey” are used. They have the following meaning:
Albatross: three shots under par
Eagle: two shots under par
Birdie: one shot under par
Bogey: one shot over par
Double Bogey: two shots over par
Triple Bogey: three shots over par
A player receives for a bogey one, a par two, a birdie three, an eagle four and an albatros five Stableford points. The score is the net score for each hole dependent on the player’s handicap. The player scoring the most Stableford points is the winner.
The stableford system is designed to make the game quicker. When a player realises that he cannot make any points on a hole, he is supposed to pick up his ball and note “0” or a “blob” on his scorecard.
The idea behind this system is that each player needs - on average and according to his handicap - two (net) points per hole which sums up to 36 Stableford points at the end of the 18 holes. Subject to alterations due to a course or slope rating it can, in general, be held that when you have received 36 Stableford (net) points, you have played to your handicap.
When you play a tournament valid for handicap purposes and score more than 36 Stableford (net) points, your handicap will drop a certain degree, depending on your relevant handicap group:
Handicap group 1 (up - 4,4) Shot(s) played less x 0,1
Handicap group 2 (4,5 - 11,4) Shot(s) played less x 0,2
Handicap group 3 (11,5 - 18,4) Shot(s) played less x 0,3
Handicap group 4 (18,5 - 26,4) Shot(s) played less x 0,4
Handicap group 5 (26,4 - 36,0) Shot(s) played less x 0,5
Handicap group 6 = club handicap (37 - 54) Shot(s) played less x 1,0
Obviously, when you have less then 36 (net) points your handicap will worsen. Regardless of how many shots you have played more than your handicap allows your handicap will be raised by 0.2 points in handicap group 5 and by 0.1 points in handicap groups 1 to 4. However, this worsening only becomes effective when you have missed the respective “buffer zone” applying to your handicap group. Your handicap will also worsen if you have a socalled “no return”, i.e. not handing in your score card or not completing the competition for whatever reason.
Buffer Zone Flat degradation when missing the buffer zone for 18 holes
Handicap group 1 | 35 to 36 = 1 buffer shot | 0,1
Handicap group 2 | 34 to 36 = 2 buffer shots | 0,1
Handicap group 3 | 33 to 36 = 3 buffer shots | 0,1
Handicap group 4 | 32 to 36 = 4 buffer shots | 0,1
Handicap group 5 | 31 to 36 = 5 buffer shots | 0,2
Handicap group 6 | – | –
Buffer Zone Flat degradation when missing the buffer zone for 9 holes:
Handicap group 4 | 34 to 36 = 2 buffer shots | 0,1
Handicap group 5 | 33 to 36 = 3 buffer shots | 0,2
Handicap group 6 | – | –
TOP
8. TIP
What you should know about scoring - Part 1: Gross Score, Net Score and Strokeplay
While you use the winter months to work on your swing, I will provide you with some theoretical knowledge on scoring which you will need when you want to play a competition. No matter what your handicap is, it is never too early or too late to acquire or to deepen your knowledge in this respect. A new golfer might refrain from even playing a competition because he or she feels not to know enough about scoring. However, also advanced players sometimes get mixed up with the different terms. Perhaps you are familiar with this situation: you are playing a stableford competition and your fellow competitor, who already needed seven shots to get on the green of a parfour hole, still wants to take his time finding out the perfect putting line because he convinced that the rules of stroke play apply.
First, I would like to point out that for each scoring system I will introduce to you in the followings months, two methods of counting are used. The gross score refers to the total number of strokes taken during your round of golf. The net score balances out the different playing abilities by means of the so called handicap shots each player receives. To sum it up, the player with the best gross score is absolutely the best player while the player with the best net score is the player who played best to his handicap.
Example:
Player A with handicap 2 needs 76 strokes, player B with handicap 18 needs 90 strokes. Player A wins the gross prize becauses he had the least shots. Player B wins the net prize because when taking off the handicap strokes, Player B only needed (90-18=) 72 strokes while Player A needed (76-2=) 74 shots.
Stroke Play
Stroke play is the simplest form of scoring. Each player adds up his score for the round and, once handicaps have been deducted if they are being used, the lowest score wins. Again, the lowest score depends on the scoring method. „Gross“ means the absolute lowest score, „net“ means the lowest score after the handicap is deducted.
Stroke play tournaments are often called medals. Because the player is playing against the course rather than an opponent, every putt must be holed no matter how short. There are no gimmies allowed. While nearly all professional tournaments are played like this, stroke play tournaments can cause trouble for most amateurs play-ers and often lead to long delays. Thus, there are very few medals played in a normal golf club.
TOP
7. TIP
Now or never
When the weather is bad and the conditions on the golf-course are not very inviting, the perfect time to work on your swing begins. Does this sound a bit strange to you? I know that many golfers tend to think that changes should be made at the beginning of a new season which usually starts around April. But since a teaching professional is – at least in the majority of cases – not a magician with the magic wand to immediately correct all faults, it usually takes him or her more than just one or two lessons to find out where you are having the most trouble and to give you the advice you need. And when serious changes are necessary, it will take you a while to practise and get used to your new swing. However, when the weather starts to improve no-one wants to stay to long on the driving range. And when the competitions starts it gets even more difficult because most of the golfers fear that even the slightest change might have a negative influence on their handicap. So although feeling the need for changes it ends up every year with the same good intention “Next year I will really start to work on my swing to improve.”
The winter months, however, give you enough time to make changes, adapt to them and – if necessary – to work on your new swing until it feels completely natural. Most cities and golf-clubs have indoor facilities to practise in, so you don’t necessarily have to stand outside in the rain and cold. In my opinion, the winter training becomes even more effective when you take advantage of a video analysis of your swing. I am working with the V1 system (see “videotraining” for details) and provide my students regularly with a copy of their swing on CD so that they can review their swing and see the improvements they have made over time.
Another possibility to get prepared for the next season is to go on a golf-trip with your PGA Professional. Thanks to the mild weather in Portugal or Spain you will find perfect conditions for your daily training or game on course. Under the heading “Dates” you will soon find more information on the golf tours that I offer over the winter period.
Whatever you decide, try to use the winter months to work on your swing. This will make your game more successful in the next season. And more success means more fun.
TOP
6. TIP
The scorecard never lies
The scorecard is not only a document that records the number of shots that you have played. It also gives you the opportunity to analyse where your strengths and weak-nesses are. Use your scorecard to your advantage and you will realise where most of your strokes are lost.
Try to use your scorecard during your next five rounds as a record of every shot you hit. Along with the score for each hole, mark down on your card the how many times you hit the fairways from the tee, the number of putts you needed per green, and how many times you did or did not get up and down. If you are a single handicapper, you may also want to note how many greens in regulations you hit.
This type of record-keeping will give you truer image of your strengths and weak-nesses. Moreover, when going over the results your PGA Professional can easily see where you are having the most trouble and give you the advice you need to improve your game.
TOP
5. TIP
Do you have a pre-shot routine?
A solid pre-shot routine is a must for good golf. First of all, it helps you to reduce all these distracting thoughts running through your head and to focus more exclusively on the shot you are about to make. Moreover, it helps you to get started. Golf is not a reaction sport and the golf ball will not move unless you hit it. Without a pre-shot routine, you may want to wait for this certain moment when your swing finally feels right - which then most probably will not come.
Watch any professional or single digit handicapper and you will see that they all have a certain pre-shot routine they go through before each shot, and typically they perform this routine identically for each shot.
Yet, you will also notice that each golfer’s pre-shot routine is unique. For some players, pre-shot routine comprises selecting of a club or checking the wind. Others consider their pre-shot routine to start when all those other decisions have been made and they approach the ball. To some players a certain number of waggles is important, to others a certain number of looks to the target.
It does not matter what elements you consider to be essential for your pre-shot routine. The only thing that matters is that it gives you a feeling of comfort and confidence. In this regard, I find it helpful to look down the line of play to get a visual for the shot, pay some attention to the alignment of your clubface and body and make a certain number of practice swings to feel the swing you want to make for that shot. In any case you should bear in mind that a solid pre-shot routine needs to be simple and consistent. And you need to determine what specific detail should mark the ending of your personal pre-shot after which you know you will be swinging.
Study the professionals and watch for their pre-shot routines. Pre-shot routines of some Titleist golf ball players on the world-wide professional tours, for example, can be checked out on www.titleist.com/mediacenter/preshotroutine.asp#. Find a style that fits your game and practise it on the range. Start developing your own or working on your pre-shot routine will help you to make the best possible swing at hand.
TOP
4. TIP
Align yourself right on target
Perhaps you are familiar with this situation: your swing felt good, but unfortunately your ball did not fly in the direction you expected. Certainly, it may be that although it felt right something in your swing was wrong. But it is also possible that your swing was really great and that only your alignment was to blame.
Alignment is one of the most important parts of your basis golf set-up. But seriously, when was the last time you have given thorough consideration to your alignment or have actually worked on it?
For properly aiming to your target you first align your club, more precisely your clubface. In general, the clubface should be square to the target. In order to find the “target line”, you should stand behind your ball in a direct line to your target and try to envision an imaginary line that starts from your clubface and extends through the ball to your target. As you see this line, you should look for a distinctive feature, like a divot, that is just in front of you on the target line. Keep this feature as an intermediate target in mind along which you want to hit the ball. When addressing the golf ball, the intermediate target helps you both to see and continually refer to the target line without having to lift the head and look at a distant spot.
Once you have found your intermediate target and aligned your clubface, you can align your body by placing your feet on an imaginary line that is parallel to your target line. Your hips and shoulders should be parallel to your stance. Imagine a set of railway tracks with the outer rail being formed by the target line and the inner rail being formed by your stance. Only the outer rail – starting with your clubface and extending through the ball – should be going to your target. The inner rail should be leading left of your target, if you are right-handed or right of your target, if you are a left-handed player.
Often, I see golfers setting their body up to their target. But by doing this, they shift the target line well right (right-handed player) or left (left-handed player) of their intended target. When you have problems with your alignment, try to understand the basic principle on a smaller scale. Set up for a short putt and look both at the target line and at the position of your body. You will see the target line (outer rail) going at the hole and your stance (inner rail) as well as your hips and shoulders pointing left of it, if you are right-handed or right of it, if you are left-handed.
TOP
3. TIP
Why one Glove?
New golfers often ask me: Why do I need just one golf glove, and why do I wear it on my left hand when I am a right-handed player and on my right hand when I am a left-handed player?
You wear the glove only on your top-hand. As explained in „Holding the Club“ this is the left hand for right-handed players and the right hand for left-handed players. Since the top hand is, in essence, the one holding the club, players are inclined to have their top-hand grip to tight and thus put to much pressure on the golf grip. The purpose of a golf glove is to reduce this pressure taking advantage of a simple physical phenomenon: whenever a pad is placed between any two surfaces, there is a lessening of pressure.
The next time you are on the driving range, try hitting a few drives with a loosening top-hand grip at the top of your backswing - you may experience a gain in distance. If this is true, then your previous top-hand grip was likely too tight.
TOP
2. TIP
Holding the Club?
Nothing keeps a player from making progress in golf like a bad grip. If you are having trouble getting your clubface square on impact, there is a high probability that the problem starts with your grip.
Before I make you familiar with my suggestion how to hold the club, I would like to clarify which hand is the top hand and which hand is the bottom hand so that I can relate to both right-handed and left-handed golfers. For a right-handed golfer, the left hand is the top hand, and the right hand is the bottom hand. For a left-handed golfer, the right hand is the top hand, and the left hand is the bottom hand.
Start by standing and holding the club in your bottom hand, where the grip meets the shaft. The shaft should be at an angle where the club head is at your forehead, towards the sky, and the grip is at your waist. The club should be completely vertical. Please make sure that the club face is square to your shoulders and that you look at the midline of the grip.
Place your top hand on the club so that it is approx. 1 cm down from the upper end of the grip. Wrap the fingers around the grip, but make sure that the palm only lightly touches it. The grip should be nestled in the crease where the fingers meet the palm, the end of club resting against the fleshy pad in the palm of your hand. You should be able to see two to three knuckles on the back of your top hand. The tip of the thumb should be placed on the middle of the grip, which is, in general, indicated by markings.
Next, slide your bottom hand toward your top hand until both hands touch. Depending on the size of your hands and length of your fingers either interlock the pinky finger of your bottom hand between the index and the middle finger of your top hand (so called interlocking grip), or have your pinky overlap the crevice between the index and the middle finger of your top hand (so called overlapping grip). The life line of your bottom hand covers the thumb of your top hand. The thumb of your bottom hand lies diagonally across the grip so that thumb and index finger form a „V„. This „V“ should be pointed to your right shoulder, if you are a right-handed player, respectively to your left shoulder if you are a left-handed player. Please make sure that the tip of your thumb still has contact with the grip.
The key to success is to have a grip which has flexibility in the wrist joint and enough pressure in the fingers to control the club. Remember that the grip should be essentially with the fingers, rather than with the palms of your hands. Holding the club in your fingers will allow you to keep your arms extended during the swing and thus to generate more speed. If you hold the club in the palms of your hands, your elbows will bend, causing a lack of extension and a decrease in speed.
For best results in correcting or improving your grip, contact your local PGA professional.
TOP
1. TIP
Grip Check
The first and one of the most important elements of a golf swing is placing the hands on the golf club. The reason is that the positioning of the fingers around the grip of the club sets the alignment of the wrists and has the greatest influence on the clubface position.
The goal of your golf grip is to align the clubface square to the hand position. Clockwise or counterclockwise rotation on the grip will alter face position at impact, potentially causing a sliced or hooked shot. Also, the hand pressure a player squeezes the club with influences timing, speed and control. Finally, how far up or down the hands are placed on the shaft alters the club's effective length, which effects posture and distance.
Today's grips come in various sizes, shapes and materials to match the preferences of individual players. Many of the grips also have markings to help a player set a consistent grip position. Some practice grips are actually moulded so beginning players will know exactly where to put their hands each time they grip the club. Please note that these are training grips only and not for use in normal play or competitions.
If your grips are worn out and slick you will tend to squeeze the club too tight, creating a lot of tension in your arms and shoulders. This will cause a short, quick swing. Your grips also need to be the correct size. If the grip is too large, your hands are slow to react to the swing, and if the grip is too small, your hands will overreact. Having a grip put on your club that fits your hand size and comfort level is a simple and necessary part of the club fitting process. This leads me to remind you that now and again you should check the condition of your grips, e.g. at the beginning of the season.
TOP
|
Quicklinks
+ + NEW + +
17. TIP –
THE ART OF
CHIPPING - PART 1
16. TIP –
THE ART OF
PUTTING - PART 5
15. TIP –
THE ART OF
PUTTING - PART 4
14. TIP –
THE ART OF
PUTTING - PART 3
13. TIP –
THE ART OF
PUTTING - PART 2
12. TIP –
THE ART OF
PUTTING - PART 1
11. TIP –
SCORING PART 4
10. TIP –
SCORING PART 3
9. TIP –
SCORING PART 2
8. TIP –
SCORING PART 1
7. TIP –
NOW OR NEVER
6. TIP –
THE SCORECARD
NEVER LIES
5. TIP –
DO YOU HAVE
A PRE-SHOT
ROUTINE
4. TIP –
ALIGN
YOURSELF
RIGHT ON
TARGET
3. TIP –
WHY ONE
GLOVE?
2. TIP –
HOLDING
THE CLUB
1. TIP –
GRIP CHECK
|